EasyCatalog supports the loading of data contained within XML files via the EasyCatalog XML Data Provider.
This module is purchased in addition to EasyCatalog itself, and may be combined with other modules such as the Pagination module.
Table of Contents
What is XML?
XML, (abbreviated from eXtensible Markup Language), is very flexible markup language used to store and transport information.
Category and product data for a typical catalog typically looks similar to the following when represented as XML:
<?xml version="1.0" encoding="UTF-8" standalone="yes"?> <Catalog CategoryName="Sample"> <!-- Catalog structure --> <MainCategory CategoryName="Switches & socket outlets" CategoryID="101" CategorySortOrder="1"> <Category CategoryName="Simplo light switches" CategoryID="202" CategorySortOrder="1"> <SubCategory CategoryName="Easy use light switches" CategoryID="301" CategorySortOrder="1"> <!-- Product records --> <Products> <Product ProductInstanceID="123" ProductCode="E5145" ProductSortOrder="1"> <ProductAttributes> <Description>Rocker switch, single, 10A</Description> <Colour>WH</Colour> <Voltage>240</Voltage> <Amps>10</Amps> <Pricing RRP="6.13" Trade="3.68" /> </ProductAttributes> </Product> <Product ProductInstanceID="124" ProductCode="E5150" ProductSortOrder="2"> <ProductAttributes> <Description>Rocker switch, double, 10A</Description> <Colour>WH</Colour> <Voltage>240</Voltage> <Amps>10</Amps> <Pricing RRP="6.13" Trade="3.68" /> </ProductAttributes> </Product>
This example only contains part of an XML file and is therefore not a valid XML document.
To learn more about XML please refer our Introducing XML files article.
Obtaining or creating a suitable XML file
Many standard product management or web-site management solutions allow the export of detailed information via XML.
As a general rule, the XML file should contain as much information as possible that will be used within your catalog. Our strong recommendation is if you’re not sure whether a field will be used in your final catalog it’s best to include in your XML export just in case.
Fixed export schema
In many instances the format of the exported XML file will be already set within your source application. In most cases EasyCatalog can be configured to extract relevant product and catalog data, provided there is a logical and consistent arrangement of information.
Creating a specific schema for catalog
In some instances an XML file will not be pre-configured and you will create the export schema from scratch. In this instance is is very important to ensure that your XML file contains all of the required fields to outline the category structure as well as containing product records and detailed product attributes.
Export the whole catalog as a single file
EasyCatalog is designed to work best with a single XML data source for your whole catalog. Using a single data source is much better for catalog management (including data updates), page numbering.
A catalog is then typically separated into chapters when it is created, but the management of the catalog is still done using a single XML file.
For more information on best practices regarding the management of your source data you may like to refer our Managing data for your catalog guide.
The EasyCatalog XML Data Provider
Loading XML files into an EasyCatalog panel requires the EasyCatalog XML Data Provider. The EasyCatalog XML Data Provider may be installed and used alongside other EasyCatalog modules, either as a trial during your initial 30 day trial period or by purchasing a license separately.
For more information on how to install EasyCatalog please refer our separate Detailed instructions for installing EasyCatalog guide.
Configuring your EasyCatalog panel
Unlike other EasyCatalog panels which automatically create fields based on all of the column names in the source data, creating an EasyCatalog panel based on an XML file requires some pre-configuration.
Creating a new EasyCatalog panel
- Go to File > New > EasyCatalog Panel > New XML Data Source. The Data Source Configuration dialogue will open.
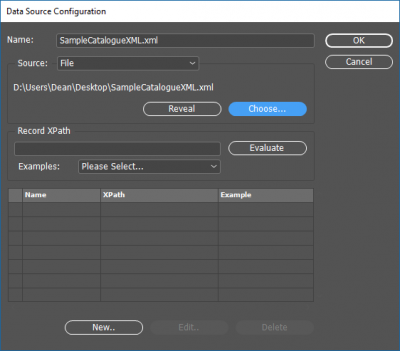
- Select Choose and navigate to your catalog XML file.
- Edit the Name field to contain your desired EasyCatalog panel name. It is recommended that this name explains the panel clearly e.g. Your Company Name Master Data. Naming the panel the same name as the file name is not recommended.

- Specify the Record XPath by entering the value into the text box or by choosing an XPath from the Examples dropdown menu.
This path should identify the relevant record node within the XML file. Records found at this level of the XML file will display as separate rows within the resulting EasyCatalog panel. In the sample XML file shown above the data rows are identified by the XPath /Catalog/MainCategory/Category/SubCategory/Products/Product.

- Click the Evaluate button to confirm how many records will be created using this XPath.
If you’re expecting a catalog with 2,000 odd product records then this number should be close to 2,000. If this number is 20 you may need to select an XPath deeper within the tree structure as you have probably selected a category record. Conversely, if this number is 20,000 then you may have selected to display product attribute values as rows – you will need to select an XPath less deep within the tree structure.
For more information describing how XPaths are created and configured please refer our separate xxx guide. - You will be prompted to automatically create fields within your EasyCatalog panel.
 Click Yes to automatically create these fields. You will almost always need to create additional fields as the fields created automatically are always at a level equal to or deeper than the specified Record XPath.
 - Create a field which uniquely identifies each product record. If a product only appears in your catalog once then you can choose the Product Code; otherwise you will need to choose a unique identifier for this product instance. In this example the ProductInstanceID is an attribute contained within the Product element <Product ProductInstanceID=”224″ ProductCode=”E5150″ ProductSortOrder=”2″>. The Name and Path are entered as follows. Click OK to return to the Data Source Configuration dialogue.
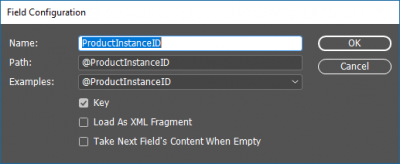 For more information on how to specify the correct unique record you may like to review our What’s the difference between a product record and a product instance record? guide.
 - Click OK on the Data Source Configuration dialogue. Your EasyCatalog panel will now be displayed.
- Take some time to review the data shown within the panel and to confirm it matches the data you are expecting.
Adding fields to an XML panel
- To create additional fields within the newly created EasyCatalog panel, click the Information Icon found at the bottom left of the panel to open the Information dialogue.
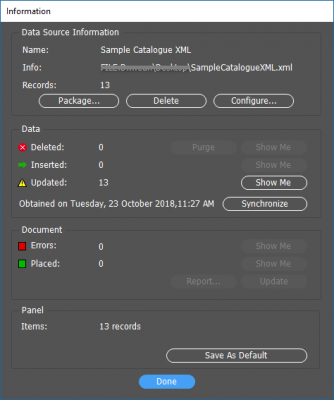
- Click Configure to open the Data Source Configuration dialogue.
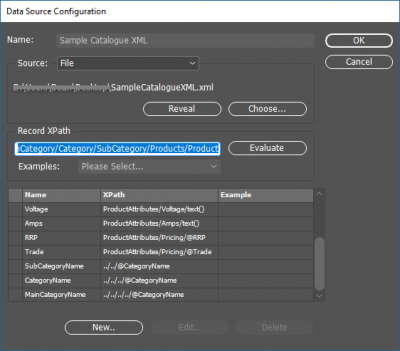
- Click New to create a new field. Click Yes when prompted to refresh the XML data.

- The Field Configuration dialogue will open.
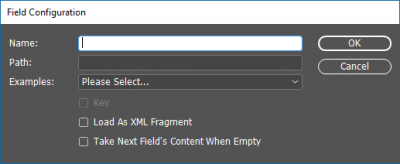
- Type the desired field name in the Name field and the corresponding XPath in the Path field. If you are setting up the categories which define your catalog structure you will probably need to start your XPath with one or more ../ to move up the category structure. Click OK to create the field and return to the Data Source Configuration dialogue.
Refer the separate article Worked Example: XML and XPaths for help with setting up all your fields. - Repeat Step 5 as required to create additional fields for your data.
- When you have created your required fields click OK to close the Data Source Configuration and return to the Information dialogue.
- Click Synchronise to add the newly created fields to your panel. (Without synchronising your fields won’t appear in the panel).
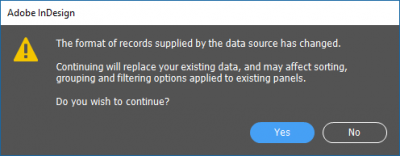
- Click Yes to acknowledge that The format of records supplied by the data source has changed.
- Your newly created fields should now be visible to the right-hand side of your existing EasyCatalog panel.